Showing posts with label Fimo. Show all posts

Saturday, May 8, 2010

QuikPic: Color Club Chelsea Girl

I haven't done my nails in months. Months!

When I get busy with school all else goes by the wayside until I look like a defeated sasquatch. Slowly my makeup use starts to decline... and I'm no longer making sure my brows look good... Eventually, it's a good day if I brush my hair. :P (I am only partially kidding.)

Anyway, I have to admire the other girls for keeping up with their manis no matter how busy they are. I have never been in the practice of doing a daily NoTD (something that might change with my discovery of Seche Vite), in part because I typically like to take a while to do nail art, and I don't often wear a plain nail color. But after a month of bare hands and being bored... I figured something was better than nothing. And oh what a something I picked!

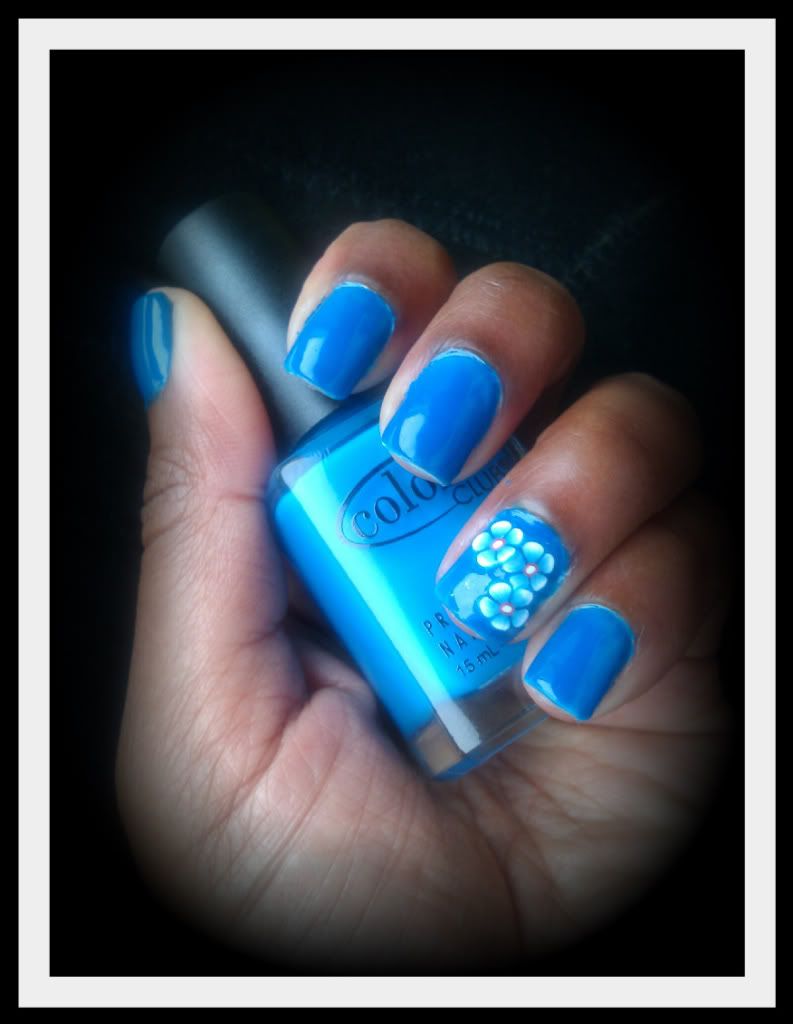
This is a really quick shot (with my phone's camera) of Color Club's Chelsea Girl, my first "full" Color Club polish and, I think, the first polish I want a backup of. There's something incredibly sophisticated about cremes, in my opinion, even bright (neon) blue cremes such as this. I cannot even explain how happy this color makes me...but my fingers and toes now feel divine. Perhaps it will inspire some work out of me. :P


In reality I think this color leans a bit more cerulean than is seen in the picture. But it was a quick shot without me changing any settings on my phone so I'll live with it. Application was streak free in three coats, but I did a fourth for extra measure. As with many neons it dries a bit matte but looks gorgeous with a topcoat (I chose Seche Vite) and sort of exhibits what I consider to be jelly-like qualities.

Anyway... I'm in love. Chelsea Girl and I are running away together. With a couple of fimo decals along for the ride. :)

P.S. My nails haven't been this short in forever. But I had a few really bad breaks (geocaching+logs+long nails=bloody hands) so... yeah. Rocking the short nails for a bit. Liking it though. :)


Wednesday, March 3, 2010

On slicing fimo canes

When I first posted about my receiving a big lot of fimo canes on eBay from a Hong Kong seller, quite a few of you responded with questions on how the heck these things were used. So I thought I'd attempt a little tutorial on how I slice fimo canes since my method is a bit different than a lot of the ones I've found on YouTube and on other blogs.

The first question on slice thickness I've already answered but I'll repeat it: you can slice them as thick as you want and, if you have the right blade and reasonably steady hand, you can slice them practically paper thin. You might not want them paper thin because when they are very thin, they are translucent and have a tendency to curl up when glued on the nail and covered with a topcoat.

Here are a couple of slices of fimo leaves as compared to the thickness of a dime. The thickest one is a bit more than a third of the thickness of the dime. The thinnest is probably no thicker than a sheet of paper. As you can see, it's a bit more of a challenge to keep a uniform thickness slice to slice and even within slice. (I have a shaky hand and am lazy; a determined perfectionist could probably get them perfectly thin and even.)

Most fimo canes are about 2-2.5 inches long. I can cut about 80 slices per inch.

The second question is what to use to slice fimo canes. I originally started with an exacto knife but that tended to warp and smudge the designs. I then turned to a tissue razor I had bought off of eBay awhile back for other artsy-craftsy activities. (Individually, on eBay, they go for a couple of dollars the last time I checked but I managed to get ahold of a pack of ten that came with another 50-fimo-cane lot.)


Tissue blades are very thin and pretty sharp. And had the unfortunate tendency of nicking the sides of my nails while I sliced. They cut through these canes beautifully and I think they're worth the investment for how easy they'll make cutting through the fimo.

As I already mentioned, I feel like I slice fimo slightly differently than other people who have blogged (or vlogged... is that term even really used?) on it. The method I've seen most commonly was slicing the fimo cane as if it were, say, a cucumber... but smaller. That is, use one hand to steady the cane and the other hand to slice. Having questionable vision and often shaky hands, this was a miserable method: I got a lot of half-hearts and quarter-flowers and uneven shards of My Melody's face. So I switched around my technique to increase the stability of the blade while cutting. It's not fool-proof (as you shall see) but it works much better for me.

Excuse the bad photo but this was the best photo I got to show you how my fingers are placed:

1. Make the cane face you so you can keep an eye on the progression of the slice.

2. Decide how thickly cut you want the slice and position the blade.


3. Use both hands to hold the blade on either end of it (using your thumb and pointer finger). Optionally, use your middle finger to hold the cane steady behind the blade.


4. Push down slowly and evenly. Pay attention to try to insure uniform thickness and don't be afraid to slightly adjust the course of your blade if it starts to look like you're not going to get a complete slice... which I did not do for this next picture:

Oops! This is a mistake I made far more in the beginning than now but I was unsuccessful in my half hour endeavor to get a good photo of my slicing off a good piece of fimo cane. But you guys get the point, right? :)

5. Finally, remember to rotate the fimo cane so that one side doesn't get too flat. For instance, if I were to continue slicing this kitty face, I'd flip it onto its ears and cut a few slices like that before rotating it to the side of its face again.

Understanding that this is not the most clear or helpful tutorial ever, I made a short video just showing you the action of slicing the fimo:


I love slicing fimo! It's my new nervous activity: when I'm super stressed, I start slicing away. I even bought some organizers to accommodate this new quirky, compulsive sub-hobby. (Woohoo, dollar stores...)

Isn't it so cute? I have these grouped according to some logical system that makes sense to me (but may be weird to everyone else): "designs that come in circles", "flowers", "smileys", "fruits", "hearts", "teardrop/almond-shaped things that can be leaves", "things with faces", "cute and rectangular-like objects", "bugs and butterflies", "non-fruit food", "vaguely pentagonal shapes that can be stars or flowers".

"Flowers"
Some of these look like they were sliced quite thickly but almost none of them exceeded the thickness of half a dime.

"Fruits"

"Things with faces"


Anyway, I hope this post helped somebody out. :)


Sunday, February 14, 2010

Happy Chinese New Year + Valentine's Day!

I decided about a month ago that for February 14th, I was going to present you with over-the-top fimo nail art manis. That or manis in red and/or gold polishes. I decided tacky-ass fimo nail art was a more fun idea. I mean, what on earth was I going to do with all of these fimo canes I got off of eBay??


You know what's weird? I want MORE!! The cuteness, it seduces! (I think the little critter underneath the watermelon is supposed to be My Melody.)

Unfortunately, I had a recent break in my index finger and had to shorten my nails. My nails are pretty tiny to begin and it is hard to do truly OTT fimo designs on itty bitty nails. So I did it on some nail wheels instead. (Sorry it's such a cop-out. When my nails get long again, I'll actually put, like, fruit and dragonflies on them.)

For those wondering about how thick these things are, they're not that thick and most of them are not that big. This leaf is about 75% the normal size of a lot of the fimo canes I have:
Behold, a dime. And a fimo leaf.

I bought whole canes and sliced them myself: some of them are sliced thicker than others but some are sliced pretty thinly. Using a tissue blade, I can get some very thin slices. However, the thinner I try for, the more likely I'll mess up the slice.

Behold, the same dime. And four fimo leaves. The thickest slice is less than one-half the thickness of the dime. The thinnest slice is pretty much as thin as paper.

It's not always desirable to get them paper-thin though because then the color of the slice will be translucent and be less vibrant on the nail. I'll try to put together a tutorial on how I sliced my fimo canes since I used a slightly different technique than a lot of the YouTube tutorials I watched. (Hoping to get that posted before the month's out.)

Anyway, onto the (fake) nails. Go easy on me: I'm just a beginner! ;)

Chinese New Year #1


When the heck else would I ever get a chance to use these opera mask fimo canes? The background is Color Club Feel the Beat and I used some gold foil... badly. But I kind of like the effect: sort of like gold leaf. (Gold and red are traditional Chinese colors.)

Chinese New Year #2
Here I used Sally Hansen Insta-Dri Whirlwind White and Misa Secrets. The "branches" are Orly Solid Gold. I also tore off the leaves off some nail art stickers and used them as leaves here. Why is this spring-y design included? Because Chinese New Year is also the Spring Festival. (Growing up, when using Mandarin, I referred to the Western New Year holiday as "New Year's" and the Chinese New Year holiday as 'Spring Festival'.)

Chinese New Year #3
I like the use of the masks much better on this one. The base color is Sally Hansen Insta-Dri Lightening. The failed-gradient glitter is a Fasio glitter (but I'm not remembering the number right now).

Valentine's Day #1
Base color is Cetuem 163. I had these foil heart nail decals so I decided to jazz up an idea that might have turned out alright if I had used heart slices of substantial and uniform thickness. A good illustration of why cutting the fimo cane too thin is sometimes going to backfire: it becomes translucent and curls when the glue/topcoat dries.

Valentine's Day #2
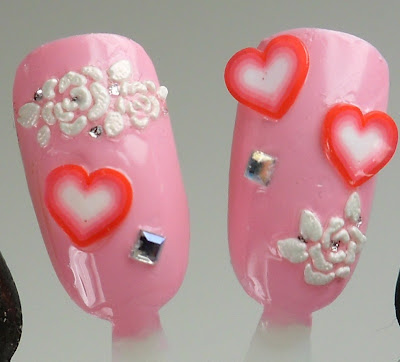
I have no idea when I amassed so much nail art crap. I am totally forgetting which pink I used (Orly Polo Princess, possibly) and some nail art stickers, gems and, of course, fimo hearts. I didn't even realize that the middle layers of the heart matches the base color I chose until I looked at the pictures I took.

Valentine's Day #3
I liked the effect with the opera mask tips on the other one enough to try it again with a V-Day (or rather, anti-VDay mani). The base color is Revlon Street Wear Tar, which needed more coats than seemed necessary to achieve opacity.

Valentine's Day #4

The base color for this one was a gold holo Icing mini. This one started out as a CNY design but then I changed my mind on it and made it into a... sort of V-Day design. There was a single lonely fimo opera masks on each nail, surrounded by some magenta mylar flakies but it looked boring and dumb so I scraped off the masks and then glued some rose and leaf fimo slices on. I actually think it's very useful to have fimo slices that aren't uniform in thickness and partial slices: it makes layering a bit easier and more interesting.

Well, that's it for now. I really enjoyed making these and will probably do more of them in the future. (That and I bought, like, 50 more fimo canes. And more nail art stickers. So I should use them.)


Related Posts with Thumbnails