Showing posts with label Icing. Show all posts

Tuesday, March 5, 2013

Unnamed Icing Green Glitter over Dior Amazonia

It bothers me when nail polishes don't have names...

Unnamed Icing green glitter over Dior Amazonia 

One of in a set of mini Icing glitters. Green and silver hex and square glitter in a lot of emerald green shimmer. Can't quite tell how many coats it would've taken to become opaque but this was three coats of the Icing on top of a dark green creme.

Tuesday, February 1, 2011

Icing Passion

I'm a sucker for three things: mini bottles, layering, and a good deal. This was all three.


This little mini bottle of Icing Passion was something that I stumbled upon in a package of five polishes that are all different tints of frosty whites and was in the clearance bin at my local Icing store. What can I say, it looks shocking like, oh, I don't know, six polishes in my collection. Not that it's not nice, because it is - it gives a nice little frosty finish to any dark polish (shown here is Ulta's Little Black Dress, I believe) and gives a nice little kick on the second day of your manicure if you are like me and are too lazy to change your polish but need a little something different. The bad part is that it's nothing special.

So what does this mean? Yours truly needs to stop falling for polish because it's cheap. *sigh*

Happy day, all!

Thursday, September 30, 2010

Sally Hansen fail, Icing win

The other day, I was in the mood for a little retail therapy. Thanks to CVS, my credit card and an extra thirty minutes before I was due in a meeting, I was able to partake in some. Credit also goes to Sally Hansen, for having a nice new display of dark colors that I assumed were from a new fall collection (now that I look at permanent displays, I think they were just designed to make me think they were new - no bueno, Sally Hansen) because one of my purchases was a lovely bottle of Sally Hansen Complete Salon Manicure in Midnight in NY. It had been a rough week, and sadly it did not end with this polish.


Sally Hansen Midnight in NY

Please note that I said "lovely bottle," as the polish in the bottle was much lovelier than the polish on my nails. If it pleases the court, please note the above photo as Evidence #1: streaky application, VNL after two coats (for $8 a pop, I expect better) and NO GLITTER. That's right, I said GLITTER! There's glitter in that there polish, but WHERE IS IT? Evidence #2: Bottle photo -


THERE is the glitter! We found it! It's in the bottle! Of course it is, because why would I want it on my nail, making it look all lovely and everything? Why would I even expect the shiny, holo glitter effect that the appears so gorgeous in the bottle to ever be on my nails? Especially for $8! That is clearly something that I should have to pay $20 for, right?


Icing Blackout


INCORRECT, because THIS only cost me like $4 and it is lovely, black, dense holo MAGIC! See, Sally Hansen? Pretty bottle, pretty polish. This is Icing Blackout that I bought last winter, and it is what I wanted Midnight in NY to be, but it was not. So why did I bother to BUY Midnight in NY when I already had Blackout?


I don't want to talk about it. I just did. You know what I mean.


Happy day, all!

Sunday, February 14, 2010

Happy Chinese New Year + Valentine's Day!

I decided about a month ago that for February 14th, I was going to present you with over-the-top fimo nail art manis. That or manis in red and/or gold polishes. I decided tacky-ass fimo nail art was a more fun idea. I mean, what on earth was I going to do with all of these fimo canes I got off of eBay??


You know what's weird? I want MORE!! The cuteness, it seduces! (I think the little critter underneath the watermelon is supposed to be My Melody.)

Unfortunately, I had a recent break in my index finger and had to shorten my nails. My nails are pretty tiny to begin and it is hard to do truly OTT fimo designs on itty bitty nails. So I did it on some nail wheels instead. (Sorry it's such a cop-out. When my nails get long again, I'll actually put, like, fruit and dragonflies on them.)

For those wondering about how thick these things are, they're not that thick and most of them are not that big. This leaf is about 75% the normal size of a lot of the fimo canes I have:
Behold, a dime. And a fimo leaf.

I bought whole canes and sliced them myself: some of them are sliced thicker than others but some are sliced pretty thinly. Using a tissue blade, I can get some very thin slices. However, the thinner I try for, the more likely I'll mess up the slice.

Behold, the same dime. And four fimo leaves. The thickest slice is less than one-half the thickness of the dime. The thinnest slice is pretty much as thin as paper.

It's not always desirable to get them paper-thin though because then the color of the slice will be translucent and be less vibrant on the nail. I'll try to put together a tutorial on how I sliced my fimo canes since I used a slightly different technique than a lot of the YouTube tutorials I watched. (Hoping to get that posted before the month's out.)

Anyway, onto the (fake) nails. Go easy on me: I'm just a beginner! ;)

Chinese New Year #1


When the heck else would I ever get a chance to use these opera mask fimo canes? The background is Color Club Feel the Beat and I used some gold foil... badly. But I kind of like the effect: sort of like gold leaf. (Gold and red are traditional Chinese colors.)

Chinese New Year #2
Here I used Sally Hansen Insta-Dri Whirlwind White and Misa Secrets. The "branches" are Orly Solid Gold. I also tore off the leaves off some nail art stickers and used them as leaves here. Why is this spring-y design included? Because Chinese New Year is also the Spring Festival. (Growing up, when using Mandarin, I referred to the Western New Year holiday as "New Year's" and the Chinese New Year holiday as 'Spring Festival'.)

Chinese New Year #3
I like the use of the masks much better on this one. The base color is Sally Hansen Insta-Dri Lightening. The failed-gradient glitter is a Fasio glitter (but I'm not remembering the number right now).

Valentine's Day #1
Base color is Cetuem 163. I had these foil heart nail decals so I decided to jazz up an idea that might have turned out alright if I had used heart slices of substantial and uniform thickness. A good illustration of why cutting the fimo cane too thin is sometimes going to backfire: it becomes translucent and curls when the glue/topcoat dries.

Valentine's Day #2
I have no idea when I amassed so much nail art crap. I am totally forgetting which pink I used (Orly Polo Princess, possibly) and some nail art stickers, gems and, of course, fimo hearts. I didn't even realize that the middle layers of the heart matches the base color I chose until I looked at the pictures I took.

Valentine's Day #3
I liked the effect with the opera mask tips on the other one enough to try it again with a V-Day (or rather, anti-VDay mani). The base color is Revlon Street Wear Tar, which needed more coats than seemed necessary to achieve opacity.

Valentine's Day #4

The base color for this one was a gold holo Icing mini. This one started out as a CNY design but then I changed my mind on it and made it into a... sort of V-Day design. There was a single lonely fimo opera masks on each nail, surrounded by some magenta mylar flakies but it looked boring and dumb so I scraped off the masks and then glued some rose and leaf fimo slices on. I actually think it's very useful to have fimo slices that aren't uniform in thickness and partial slices: it makes layering a bit easier and more interesting.

Well, that's it for now. I really enjoyed making these and will probably do more of them in the future. (That and I bought, like, 50 more fimo canes. And more nail art stickers. So I should use them.)


Saturday, September 12, 2009

Now and Then

Let's explore the changes in my nails over the last year...

June 2008 - OPI Russian Navy


August 2008 - OPI My Private Jet


September 2008 - Sephora by OPI Never Enough Shoes


August 2009 - Urban Decay AC/DC


August 2009 - The Icing Roger That


This post demonstrates how applicable the phrase "practice makes perfect" is to nail polish. As you can see, only just a year ago my nails looked like hell after application!! My cuticles were dry and cut and hurt! So here are some of my tips about nail application that may help those of you just getting into nails:

- Apply your nail polish s-l-o-w-l-y. I am the least patient person on earth and it took me awhile to get the hang of a slow application. Applying slowly ensures less mistakes and therefore less cleanup!
- When I do make mistakes, I usually clean up either in the shower the next morning or I apply cuticle oil all over my cuticles and then clean up with a cuticles stick.
- Creative Nail Design Cuticle Eraser (most beauty supply stores) and California Mango Mend (Sally Beauty Supply) are my HG (holy grail) cuticle products. I also use cuticle oil most mornings.
- I use Nubar Nu Nails as my basecoat, which has proven to be very effective for my nails. Remember, however, that everyone is different - just because one basecoat works for me doesn't necessarily mean that it will work for you. Keep trying!

Thanks for reading!

Sunday, September 6, 2009

Feminism, Graduate School, and Nail Polish

*waves* Hi, everyone!!! I'm so sorry for my lack of posts lately but it has been a hellish week (and it is only going to get more hellish!). Diving headfirst into a full time graduate school schedule (4 classes) has been extremely stressful and overwhelming for me, especially since I have been out of school since May of 2008. I have been fighting with the administrative offices all week in addition to trying to take care of all of my name change paperwork while also struggling with the decision of whether or not to work or take out an extra student loan. Stay tuned.

My classes have been interesting so far (though the reading for one class has been very difficult to get through). One professor has us thinking about the dynamics of the body. What we mainly discussed in class was the separation between the body's external and internal parts and also the relationship between the mental and physical body. An interesting thought he brought up was the idea that when people are diagnosed with cancer, the goal is often to villainize the cancer, as in, "I'm going to beat this cancer!" But when you think about it, the cancer has developed inside your body and is growing inside your body, in your cells and organs. So is the cancer part of you, your body? How do you define YOUR body? As in, is YOUR body simply comprised of what's on the outside, or do you also take into account what's inside? I think a major reason for the separation is that we often feel that we have control over what's on the outside of our bodies while we sometimes feel we have no/little control over what goes on inside our bodies (maybe because we can't see our insides?).

One reason I brought this up is that I could connect this discussion with nails and nail polish. Our nails are part of our bodies and we cover them with colors most often to express our love for colors and our creativity. Yet sometimes we have little control over what our nails do, whether that be peeling, or chipping, or breaking, etc. Perhaps the "control" we feel over our bodies is all an illusion, as sometimes it seems that nothing I do can give me the optimal results I want (such as using acne medication to get rid of acne but then still breaking out, or using nail products that promise no more peeling and then getting peels).

But I'm just rambling. If I sound inarticulate it's because I'm just getting back into academia and I feel really rusty (who knew that only 1.5 years could do that?). But for those of you who come to this blog for pics, here they are!!

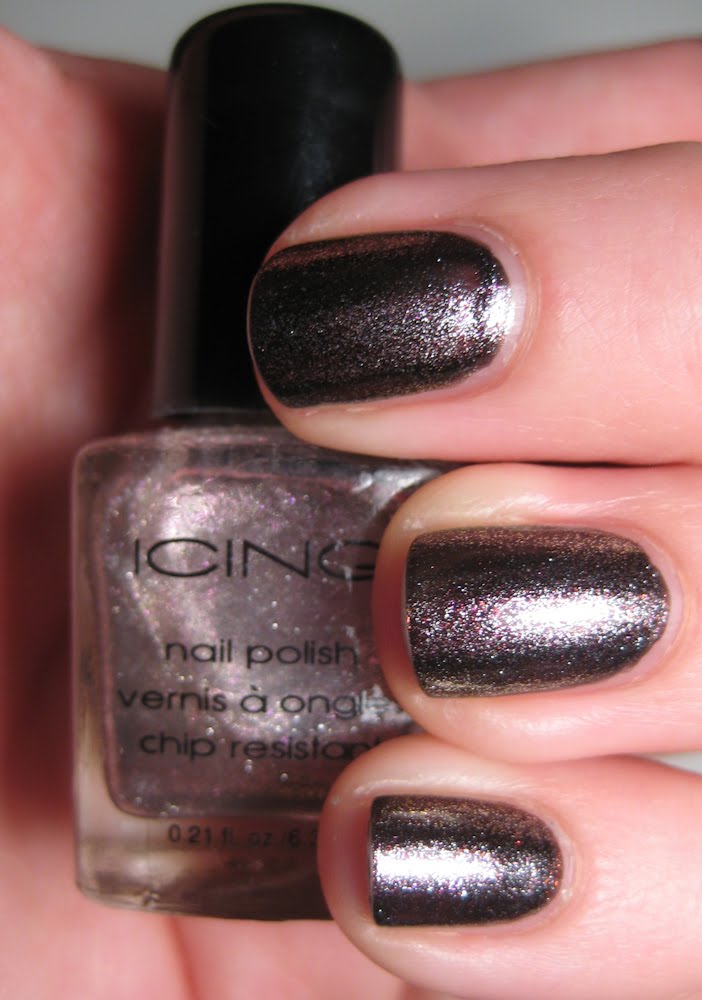
NOTD has been The Icing Roger That, which is a gorgeous teal green with a glass fleck shimmer. Imagine China Glaze Watermelon Rind with a touch more blue in it and you've got Roger That. Unfortunately, this color is one that is hard to photograph, but I did my best.

These pictures are 3 thin coats after 3 days of wear!

This first picture, though a bit blurry, is the most color accurate of the bunch.


You can find The Icing polishes at The Icing stores (typically in malls) and they are almost always around $3.50 each and B1G1 50% off.

Thanks for looking!

Related Posts with Thumbnails